This is part of Nourish’s Yoga Practise Guide Library. We were inspired to make these guides to support your own yoga practise and as a resource for teachers who want to make their classes more accessible. We were also pretty tired of all the generic teaching instructions and guides floating around the internet that aren’t inclusive, accessible or adaptable in any way.
If you would like more guidance on making this practice accessible, we have missed something, or you have any questions drop us a comment –– we love hearing from you and really do mean it when we say yoga is for everybody!
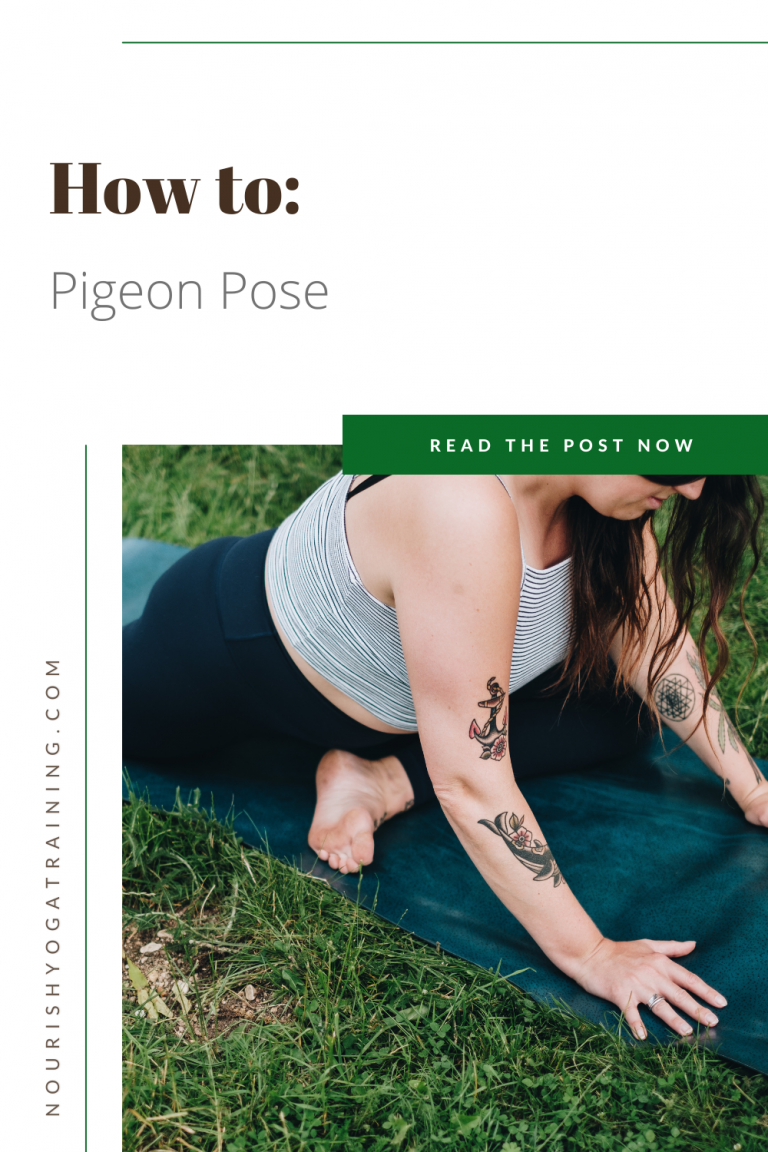
What is Pigeon Pose?
Pigeon pose (Sanskrit: Eka Pada Rajakaopotasana, which translate as one-legged king pigeon pose) is a hip opener that primarily works on external hip rotation action, which releases through the muscles of the glutes, outer hips, and top of the outer thigh. Depending on which variation you do, where you hold tension, and the architecture of your body, you also get a secondary stretch into the hip flexors, outer thigh, and a mild hamstring stretch.
The way I recommend approaching this pose is as a pose to explore external hip rotation in your body. Although pigeon pose is a fairly common pose in yoga classes (and beyond), there are some misunderstandings and preconceptions about this pose, which may need unlearning to recontextualise the pose in a way that physically serves you and your students best.
Better understanding the physical dynamics can give us a way into poses that may have previously felt anything from inaccessible to uncomfortable. A key element of embodied asana and an embodied understanding of anatomy is to work from a place of sensation, as opposed to physical form.
The Dynamics of Pigeon Pose: An Anatomical Overview
External hip rotation is the action of rolling your inner thigh outward; when you bend the knee (bringing the hip into flexion), you create a lot more space to roll your hip open — this is the key action of the front leg in pigeon pose. Try experimenting with the range of movement you have in the hip when your leg is straight and when the knee is bent.Think how many yoga poses (standing, seated, and reclined) use this bent knee-hip opening action.
External hip rotation is one of yoga’s most fundamental movement principles, however, there is huge variation in different people’s range of motion in their external hip rotation. We can observe this in ourselves and others by not just the physical expression of the movement but how comfortable, or ‘natural’, hip-opening poses such as pigeon, side-angle pose (Utthita Parsvakonasana), and Baddha Konasana feel in our bodies. Often any restrictions in movement are put down to down to ‘being tight’. However, the actions of our hips are influenced not just by soft tissues (such as short, tight, or weak muscles) but the shape of the pelvis. Where the hip socket is located on the pelvis, the depth of the hip socket, and the shape of the femur bone — particularly around the head of the bone (ball) that sits in the hip socket, also all influence how far and easeful hip openers are and what they look like externally. The body is not symmetrical either, so as you have two hips you may have minor or more pronounced differences in the structure of your right and left hip. What works for you on one side of your body, may not be suitable on the other.
Our intention with pigeon pose is to find a variation that suits our range of external hip opening to create a safe, non-overwhelming release in the soft tissues of the outer hip. We cannot change the shape of our skeletons, nor should we aspire to, as this can lead to damaged bones and compromised joints.
By far, the most effective way to do this in a yoga context is to work with the feedback our body gives us when in the pose, communicated through sensation. Everybody will have their own sensation language, but we are aiming towards feelings of spaciousness, expansiveness, brightness, ease, release, etc. We are also looking to foster these throughout the entire being; we can feel a deep stretch in the hips, but if there is pain or we are tensing through other parts of the body or feel mentally or emotionally aggravated, this is a sign that we need to adapt the pose.
Other sensations to be mindful of are: stuckness, sparkiness, pinching, or an intensity of sensation so strong that it overwhelms, affecting anywhere from the lower back to the ankle.
The hips are in an intimate relationship with the knees and ankles, as whatever way the hip is rotating, the knee and ankle joint usually follow suit. For this reason, if your hip anatomy isn’t particularly accommodating to external (or internal) hip rotation, but you can manage to attain the rotation (or general shape of it), often it is the knee that bears the brunt. Knee injuries sustained through misguided hip opening and dogmatic perspectives on alignment are very real, and not something you want for yourself or your students. An embodied, sensation guided relationship to poses can help prevent this.
It’s worth noting that pigeon pose has fallen into the trappings of aestheticised yoga poses, and unfortunately, it’s often considered as ‘basic’ or ‘level one’ — there is no such thing. It’s important to unpick the hierarchy of poses. Whether you can bring your front leg into a right-angle (or more) with the front of your pelvis flush to the floor and feel mild sensation; or be propped up on bricks, have the foot pointing in towards the body, and feel an intense stretch; or never find comfort in floor-based pigeon is a matter of soft tissue, skeletal shape, and anything else that may affect your physical capacity. There is no ‘better’ or ‘right’ anatomy to have; there is just anatomy.
When we get to know pigeon pose in terms of sensations and fundamental anatomical dynamics, we can broaden our knowledge of what pigeon pose actually is and find variations for a wide range of bodies.
If you are curious to know more about yoga anatomy from an embodied perspective, start off by reading about it here. If you still want to know more about it, our stand-alone anatomy courses, 200-hour, and 300-hour yoga teacher trainings contain anatomy modules using these principles.
Pigeon Pose Suggestions and Variations
Floor-Based Pigeon Pose
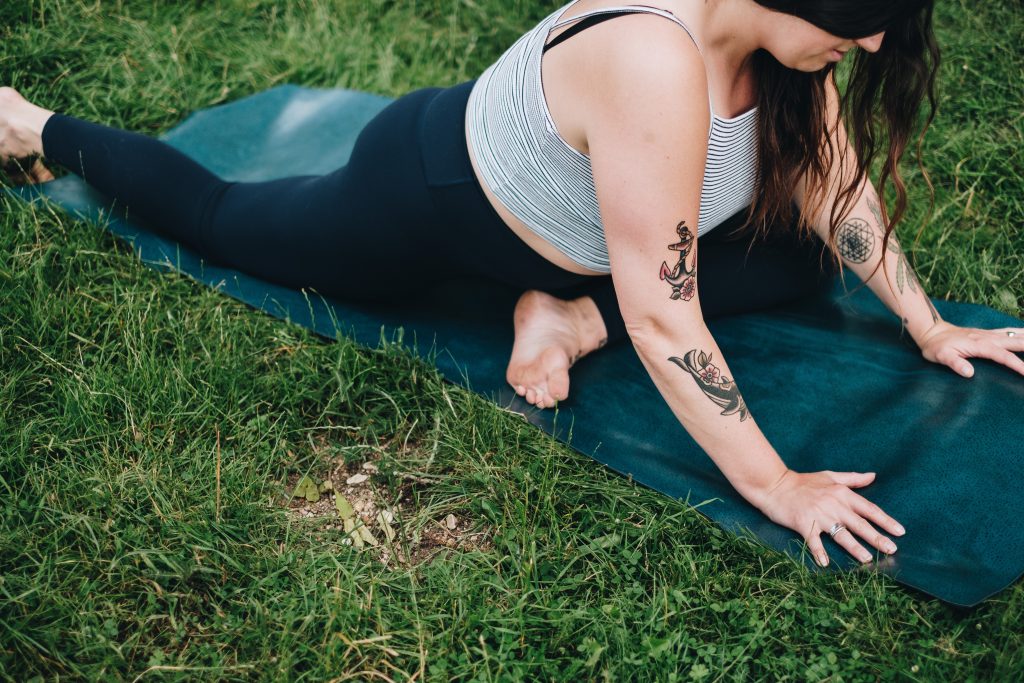
ONE: From a downward dog, step your right foot forward and wide so it lands an inch or so behind your right wrist. Mindfully shuffle your right foot across so your ankle is roughly in line with your left wrist; as you do this, let the right knee drop out to the side. Gently lower your hips down towards the floor (they don’t need to come all the way down), shuffling the left leg back behind you as you go to make space. Find a comfortable, natural angle with the right hip and shin, letting your right foot point in towards your body as much you need. The right knee should be towards the right side of your mat, behind your right wrist or slightly wider.
OR
From a kneeling all-fours position, step your right foot forward and wide, so it is an inch or so behind your right wrist. Mindfully shuffle your right foot across so the ankle is roughly in line with the left wrist; as you do this let the right knee drop out to the side. Simultaneously slide the left leg back behind you to make space for your hips. Gently lower your hips towards the floor (they don’t need to come all the way down), finding a comfortable angle with the right hip and shin, letting your right foot point in towards the body as much as you need. The right knee should be towards the right side of your mat, behind your right wrist, or slightly wider.
TWO: Tweak your legs. The adjustments you make here are to find your most supportive version of a floor-based pigeon pose. Your most supportive version is the one where you feel a comfortable sensation through the outer hip, your body feels safe, and you are overall content in the pose. These include:
– even/square the hips, so your two hip points are roughly in line with one another. (A slight tilt here is not an issue, but be mindful of your weight dropping into the right leg).
– taking your front knee further out to the side, even off the edge of the mat if needed, can help with squaring the hips off. This movement of the thigh outwards (hip abduction) supports the action of external rotation and flexion in the hip.
– If you feel uneven in the hips, either tilting towards the right glute or left outer thigh add in some props. If you only feel comfortable in this pose when you tilt strongly to the left or right, then try one of the below variations.
– adjust the angle from your thigh to shin; this may mean bringing the foot closer in towards the body (creating a smaller angle behind the knee), or bringing your foot closer towards the hands (creating a larger angle behind the knee).
– If you feel stress in the knee, try flexing the right foot. If this doesn’t make a difference, try adding some props. If the knee still doesn’t feel right, take one of the alternative below variations.
– If you feel the stretch primarily in your hamstring, try some of the above adjustments (a slight hamstring stretch is fine, it just isn’t the primary target of this pose). If this doesn’t make a difference, take an alternative variation.
– Is your back leg comfortable? Your left/back leg does not need to be in a straight line directly behind you. Depending on your bone structure, it may naturally want to track slightly inwards or outwards — let it. If your ankle is rolling in or out, this is also fine. If you want to press the top of your foot directly into the mat this is fine, but it is an aesthetic choice, not an alignment one.
Lastly, are you as comfortable as is possible for you in your hips, legs, knee, ankle, and foot?
THREE: Take a moment to push into your hands and lift your chest, notice if this increases the stretch down the left/back thigh — you may even be able to feel it up through the hip flexor and into the abdomen. Either stay here, or —
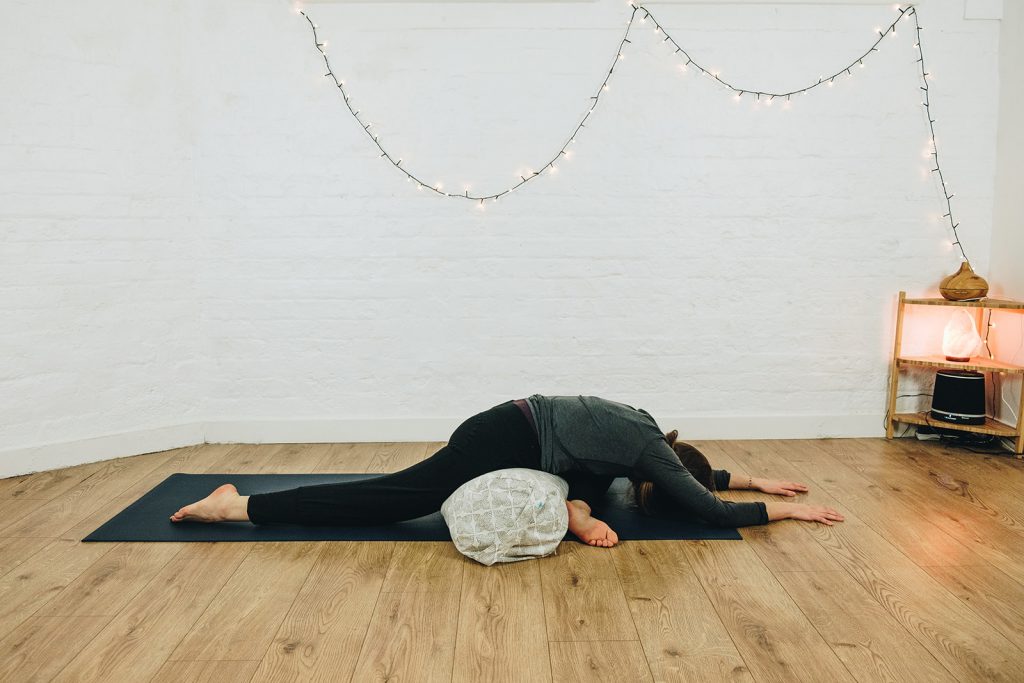
FOUR: You can walk your hands forward and start to lower your torso towards the ground, either staying propped up on your elbows, propping your forearms on a bolster or cushion, or bringing your arms to a comfortable position and your forehead down onto the floor. Notice if the stretch in the outer hip deepens as you bring the torso further to the mat. (If you want a stronger hip flexor stretch in the back leg, stay upright).
FIVE: Stay for five+ breaths. As you spend more time in the pose you may want to make adjustments depending on how your body feels, such as dropping the front of the pelvis closer to the ground, adding or taking away props, bringing your torso lower or higher, or adjusting the angle of your knee. You can also explore squeezing and releasing the glutes to see how this affects your experience of the pose.
SIX: Notice how you feel in the pose. If this is an intense pose for you, check in to see if you are clenching in any areas of the body, such as the abdomen, glutes, hands, shoulders, or jaw. See if you can start to soften through the entire body. Also check in to see if your breath has become restricted, if your mind is racing, or if you are having unwelcome thoughts — these are sometimes an indicator that the version you are taking is too full-on. You may be able to soften the breath, body, or mind by bringing your awareness to the tension, or you may prefer to take an alternative version.
SEVEN: To come out of the pose, push firmly into both hands and walk the torso up. Tuck the back toes under and push the right/front outer foot into the mat to lift the shin, creating space. Either, shuffle the back leg toward kneeling and the front leg to a lunge, and then kneeling position. Or, lift the front leg back and the hips up to a downward-facing dog.
EIGHT: Repeat on the other side. You may need to take different adjustments and even a different variation depending on how your left/other hip feels.
Floor-Based Pigeon Pose with Props
Using props is one way to find more space, evenness, and support through your hips. You can:
– place a brick, book, cushion, folded blanket, or bolster underneath the hip of the front leg.
– You can also place a bolster width ways, so it supports both the outer hip of the front leg and the hip flexor of the back leg. This is a lovely Yin yoga variation, and it may help relieve any numbness or pins and needles that are fairly common in the Yin variation where you stay in the pose for several minutes.
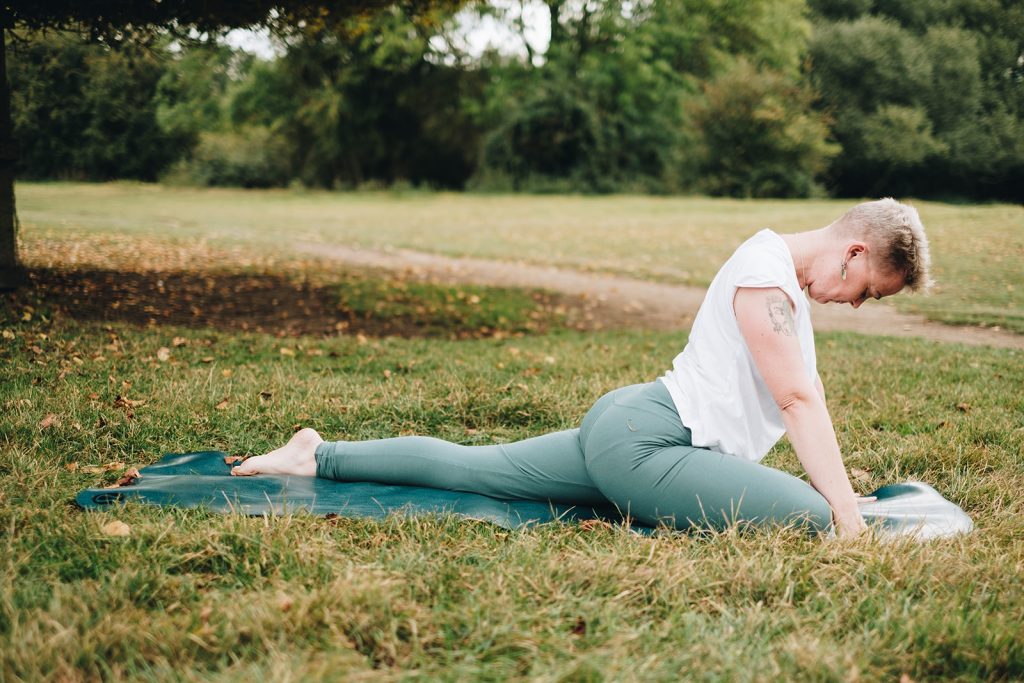
Floor-Based Pigeon Alternative/Deer pose
This is a nice alternative if you find that the above variation stresses the knee. To take Deer pose:
- Start in a seated position. Swing your right leg out in front of you, with a bend at the knee so your outer leg is resting on the ground, and swing your left leg behind you, with a bend at the knee so your inner leg is resting on the ground.
- You can adjust the legs, so they are bent at roughly at 90-degrees. However, find a position that feels right for your legs, which may be less or greater than 90-degrees in one or both legs.
- Fold over the right (front) thigh. As you fold forward, you may feel the hip stretch intensify in either the outer hip of the front leg, the hip flexor and inner thigh of the back leg, or both. You may want to fold forward onto a bolster.
- Stay for five+ breaths, and repeat on the other side.
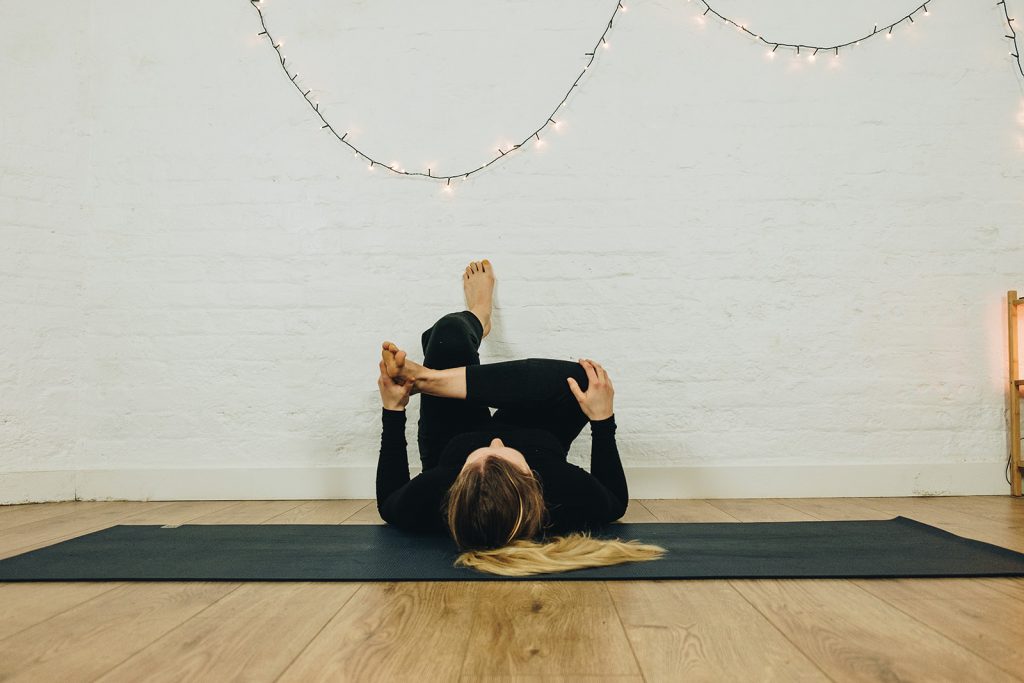
Reclined Pigeon Pose/Figure-Four Pose

- Lie on your back, with your feet planted firmly on the ground, approximately hip-width apart (or wider, as needed), with your heels a couple of inches away from your buttocks.
- Place your right ankle across the left thigh just below the knee, creating a figure four shape. Engage your right glute, and see if this allows you to roll your right thigh further open, deepening the stretch. You can also bring your right hand to your right thigh and push on the thigh in an outward motion, rolling the thigh muscle open as you do so. This is the gentlest variation of reclined pigeon, although you may be surprised at how much activating through the right hip increases the stretch. If this is too intense, walk the left foot further away from you, creating more space in the front of the hips. Either stay here for five+ breaths and repeat on the other side, OR
- Keeping the figure-four shape, draw your knees in towards your chest by hooking left hand through the gap in your legs and your right hand around the outside of your leg, hugging in as much as comfortable. You can place your hands in the crease between the back of the left thigh and calf or hold onto the front of the left shin — whichever is most comfortable for you. Keep the right thigh rolling outwards. Instead of drawing the shin all the way in, you can also step your left foot onto one or two bricks, or some cushions or a bolster. Stay here for five+ breaths and repeat on the other side.
Standing Pigeon Pose
This variation offers the external hip opening and challenges your balance.
- Stand in Tadasana, with the feet hip-width apart. Shift your weight into your left leg, and engage through the core and left thigh to support your balance pose.
- Lift the right foot off the ground, bending the right knee and drawing it up slightly towards the chest. Roll the right hip outwards, opening the knee out to the side, and place the right ankle on top of the left thigh just above the knee.
- Bend slightly through the left leg, stick your buttocks back behind you (whilst keeping an engagement through the core), and roll the right hip outwards either by using your hands on the right thigh or by engaging through the muscles of the glute, outer hip, and thigh.
- You can challenge both your balance and increase the intensity of the external hip opener by bending deeper through the left leg and sitting down as deeply as you can.
- To come out of the pose, engage strongly through your core and glutes to straighten your left leg, and release your right leg back to the ground. Repeat on the other side.
Standing Pigeon Pose Using a Wall or Chair
You can do the above variation using a chair or wall to one side of you or in front of you to hold on to and support your balance pose. You can also practice with a wall behind you, sitting back into it, so it supports your glutes — you will need to adjust how far away you are from the wall, depending on how deep you sit.
Chair Pigeon Pose
This is an excellent addition to a chair yoga sequence. You can either do the above standing variation with the chair support or the seated variation below:
- Sit in your chair, and shuffle forward a few inches, so your buttocks are approximately mid-way on the chair seat.
- Bring your right knee up towards your torso, and place your right ankle on your left thigh in a figure-four shape. If this opening is too intense or you have restricted mobility in the hips, place one or two bricks on the outside of your left ankle and step your right foot across the left shin to rest the edge of your ankle on the bricks. If you don’t have bricks, you can also step your right foot to the outside of your left foot and roll the right hip open, using the resistance of the left leg. Stay for five+ breaths, exploring the dynamics of rolling open the right hip and tensing and releasing the right glute.
- Release the right leg back to your starting position and repeat on the other side.
Legs-Up-The-Wall Pigeon Pose
This is another great Yin yoga variation.
- Start in your legs-up-the wall position.
- Bring your right ankle to your left shin, rolling the right hip outwards. You can also push and roll on the right thigh if you choose.
- Either stay with the left leg straight, extended up the wall, or bend the left leg, so the sole of your left foot is pushing into the wall — to get into this position, you will need to shuffle back to create space for your legs.
- Stay for five+ breaths before repeating on the other side.
When Do I Practice Pigeon Pose?
Before you practice or teach pigeon pose, make sure you have shown the hips some love. As it emphasises a fairly deep external hip rotation action warming the hips up with circles, lunges, and standing poses with a milder external hip opening such as triangle pose, warrior II, and tree pose will help prep your body for pigeon pose. Warming the lower body up adequately can also help keep your knees happier, particularly if you have knee issues or notice sensitivity in the knees in certain hip openers.
Sequencing pigeon pose around two-thirds to three-quarters of the way through a practice generally means the hips are prepared, and it can act as a nice grounding posture to begin to wind down your practice.
Of course, you can sequence it earlier in the practice or use it as part of a shorter regular practice if it feels right for you! Pigeon tends to be one of the poses that feels great for some people and more challenging for others. Your personal relationship with the pose will help determine when, how often, and which variation you practice.
When Shouldn’t I Practice or Teach it?
As the floor based variation can stress the knees, be mindful if you or any students have any knee niggles or an injury. The reclined variation is a good alternative as you don’t have the weight of the torso on the leg, and it offers more variations for finding different angles and positions for the hips and knee that may be more accommodating.
Sometimes pigeon is included in sequences that don’t have much emphasis on hip opening; this is fine — but make sure you are willing to take and offer alternative variations that better accommodate people whose hips are not naturally suited to deep external hip opening without being adequately warmed up.
In a mixed ability class, I would recommend sequencing it towards the end of your practice to ensure all students have had ample opportunity to warm up and mobilise their hips.
Some people find pigeon pose emotionally intense; it is very much a personal choice if you or your students are content to hold your/their own space with any strong emotional effects. How we approach and frame yoga and its relationship to healing needs careful consideration, so we don’t end up causing more issues in the long run. A yoga class is not a therapy session, ‘sitting with it’ or ‘breathing through it’ is toxic advice, and solely focusing on physically processing emotional feelings is unlikely to lead to any positive integration of past challenges or traumas. Control is sometimes branded as a dirty word, but exerting your agency in situations where you can is essential. Unless something feels helpful, safe, and there are adequate support systems outside of your practice to process challenges, I would not recommend throwing yourself into a hotbed of emotional destructiveness for the sake of a yoga pose.
How Do I Adapt Pigeon Pose To Make it Accessible? What Are Some Common Difficulties?
- One of the biggest blindspots in pigeon pose is not fully appreciating how much hip anatomy, and therefore external hip rotation varies. Yoga asana can be self-selecting as many of the poses depend on external hip rotation, which means what is sold as an ‘easy’ variation of pigeon pose may not be accessible at all to you or your students.
- Setting up a floor-based pigeon pose to find a comfortable angle in the knee and avoiding tilting excessively to either side can be challenging. Have props on hand (at least a block, book, cushion, or folded blanket) and initially set the pose up with it wedged under the glute of the front hip. Then explore taking it away and adjusting it to see how the sensation shifts. From here, determine for yourself (and let students determine for themselves) if you need more or fewer props in the pose to find the most supportive and physically sustainable variation.
- As images of pigeon pose are some of the most ubiquitous on the internet, people often come at it from a place of aesthetics as opposed to feeling. The angle of the knee should be what is right for you; a slight tilt to either side is not the end of the world; the back leg doesn’t need to be in one straight line behind you. A reclined pigeon pose, deer pose, and chair variation all do the same essential action of the floor-based variation. In short, it can be a real style over substance affair which can lead to discomfort, not getting the most out of the pose that your body deserves, and exacerbate knee injuries and instabilities. The simplest way to navigate these is to teach from a place of sensation instead of physical form.
- Understand the fundamental anatomy of the pose; once you grasp the motion of external hip rotation and what influences it in different bodies, it is easier to appreciate and teach the pose in an accessible way.
- People can get very attached to the floor-based pigeon variation, and end up tilting, bringing their front knee to the centre line of their bodies (as opposed to towards the outside edge of the mat), or putting up with twinges and discomfort in order to stay in a variation of the pose that they believe to be the ‘correct’ or ‘best’ version. Slowly working to challenge students’ (or your own!) beliefs about poses based on aesthetics, as opposed to anatomy and movement principles, can help guide them to reimagining a yoga practice that is more accessible, joyful, and sustainable.
How Do I Teach Pigeon Pose To A Mixed Ability Class?
- Respect anatomical variation by making sure you offer a range of pigeon poses.
- Explain the external hip rotation action, this only needs to be very brief, but it may help students understand why a pigeon pose, deer pose, and figure four pose all do the same thing.
- Teach from a place of sensation first, by guiding students into the pose by emphasising welcome or unwelcome sensations, they are better equipped to choose a variation that supports their body, be more present in their practice, and develop an understanding of their own anatomy that supports a healthy, joyful, sustainable long term practice.
- Acknowledge your students’ anatomy in a general way, briefly explaining that the ease or challenge experienced in hip openers is dependent not just on tension in our soft tissues but also on skeletal variations. This can help prevent students from forcing their bodies into uncomfortable or unhealthy variations believing they are practising the ‘correct’ version.
- Notice variation bias. Even when teachers offer variations sometimes they are communicated in a way where one is ‘better’ than the others. Notice if you are selling the floor-based pigeon with the thigh, shin, and knee at a 90-degree angle and the front of the pelvis flush to the ground as the ‘final’ version of the pose, or one students should aspire to. In reality, it is just one version of the pose suited to specific body types. Encourage your students to develop a practice that celebrates and supports their bodies.
- Demonstrate variations, for some students what the teacher does will influence the pose they take. Make sure to demonstrate a range of variations that support different hips.
Pin for later