Jump to:
What is Three-Part Pranayama?
Three-Part Pranayama Instructions
When and When Not to Practise Three-Part Pranayama
How Do I Make Three-Part Pranayama Accessible?
How Do I Teach Three-Part Pranayama to a Mixed Ability Class?
What is Three-Part Pranayama?
Three-part pranayama, also known as three-part breath or Dirga pranayama, is a foundational pranayama (breathing) practise that is intended to be grounding and restful. It is characterised by slow, deep breathing which can activate the parasympathetic nervous system, our ‘Rest-and-Digest’ state.
The practise consists of inhaling and filling the torso from the lower belly to collar bones, and exhaling to empty the breath from the collar bones down to the belly.
The ‘three-parts’ are a division of the torso into lower, middle and upper:
- The pelvis, lower belly and lower back
- The upper abdomen, lower ribs and sides of the chest (underneath the armpits)
- The upper chest and upper back
Three-part pranayama is a great way to establish an awareness and connection to the breath. It also teaches us how to deepen and expand the breath in the torso.
There is no fixed ratio or count for the inhale and exhale, although they are intended to be roughly even length. Above all, the intention is for the breath to be as deep, expansive and long as possible –– without forcing it.
A quick note on how breathing works…
Breathing (the process of gas exchange facilitated by the respiratory system) occurs primarily in the lungs contained in the thoracic cavity, however, when we breathe fully and deeply the other organs and tissues in the torso move to accommodate the lungs.
Although we can’t literally breathe into the pelvic bowl (or our toes, or shoulders, etc.), this is a place people commonly hold tension and therefore encouraging a softening of the tissues here (the pelvic floor muscles, buttocks and hips) can either create a feeling of spaciousness or softness, or can help to soften the belly which allows for a deeper breath.
We also can’t isolate the breath into one part of the lung (and therefore one region of the torso), however, in this practice we can definitely establish the feeling of guiding the breath into and out of specific regions of the torso.
Three-Part Pranayama Instructions
Posture
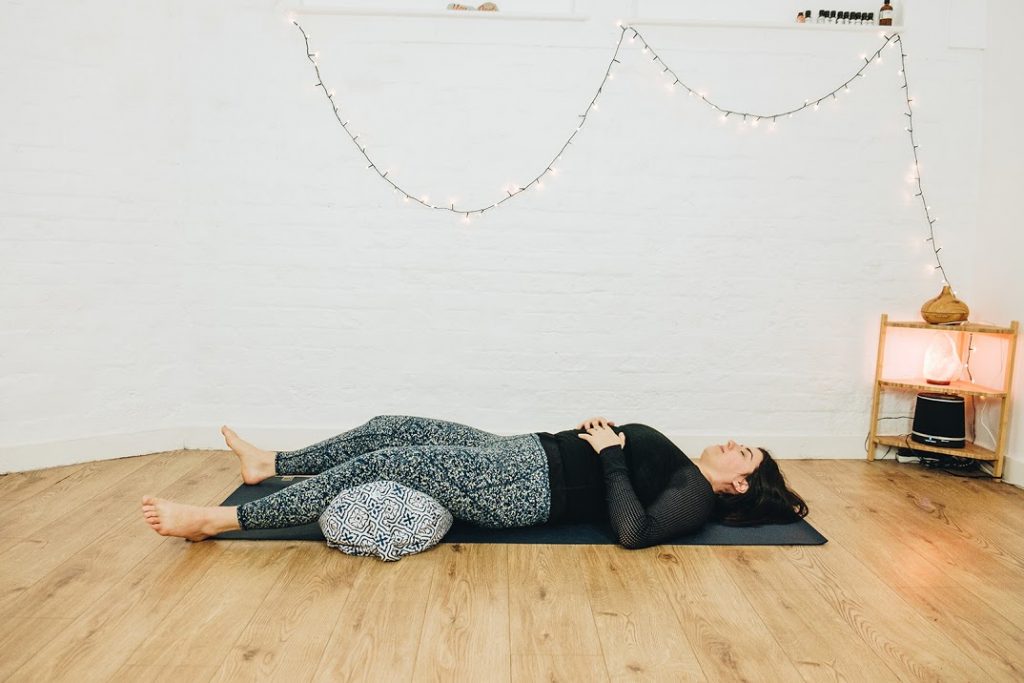
This is one of the few pranayama practices that can be done lying down and standing, as well as seated –– either on cushions, kneeling or in a chair. All that is required is a lengthened spine.
If you are seated, either rest your hands, palms face up or down, in your lap or a preferred mudra. If you are lying down the hands can rest by your side, or anywhere you like on your torso.
Preparation: Establish the Three Parts
Although you don’t need to do this, it is generally helpful to establish the three-parts of the torso before linking them together for the full practice.
Traditionally, you breathe in and out of the nose for this exercise.
Lower Torso – the pelvis, lower belly and lower back
Bring your awareness to your lower belly. You might want to place your hands here, or if you are lying down you can place a blanket or any lightly weighted object on your belly. Become aware of the breath in the belly –– you may need to deepen the breath a little to do so.
Check-in and see if you can soften the tissues in the pelvic bowl, the pelvic organs, glutes and the hips.
Can you feel the breath in the sides of the belly and/or the lower back? Don’t force the breath here, check-in and see if there is space for it. Become aware of the breath moving in the deepest part of the torso.
Breathe in and out here for 5 + breaths.
Mid Torso – the upper abdomen, lower ribs and sides of the chest
Keep the connection to the breath in the lower belly, but see if you can expand it to fill the rest of the abdomen. You can move your hands up to rest just above the navel, or if you are lying down you can take your arms to a cactus position (this helps draw the breath into the sides of the chest).
Let the breath be as expansive as is comfortable, without forcing it. Can you feel the breath travelling from the lower torso to fill up beneath the armpits?
See if you can establish a sense of ‘three-dimensional’ breathing where the breath fills not only the front of the torso, but also the sides and back.
Breathe in and out here for 5 + breaths.
Upper Torso – Upper back and chest
Keep the connection to the breath in the lower and mid-torso, and see if you can expand the breath into the upper chest too. You can move your hands up and rest your fingertips on your collar bones. As you inhale you may feel the collarbones lift.
See if you can also expand the breath into the upper back.
Note: it is fairly challenging to breathe into the upper torso and keep the connection to the lower torso –– many people struggle with this. The breath can become ‘trapped’ in the upper chest, which might make you feel anxious or short of breath. Only draw the breath higher if it feels comfortable for you, otherwise, focus on finding as much space as possible in the lower parts of the torso and in time you may find that the breath can comfortably draw higher.
The Practice
Rest your hands where is most comfortable for you.
On an inhale, breathe first into the pit of the belly and expand the breath up into the ribs, chest and all the way to the collar bones –– or as high and full as is comfortable.
On an exhale, empty from the collar bones down through the chest to the belly, until you feel empty.
Inhale fill upwards from belly to chest. Exhale empty downwards from chest to belly.
Repeat as many times as you like.
Practice Notes
- It can take a few breaths to establish the rhythm and get a feel for how deep or far up you can draw the breath without it feeling restricted. Take your time in establishing a comfortable rhythm.
- There is no fixed length to the inhale or exhale, but try and keep them as even as possible. Some people may prefer a longer exhale, which is fine.
- It is possible to add retentions as well as bandha engagement into this practice. This should only be done if you are familiar and comfortable with these practices.
- The intention of this breathing exercise is to establish a gentle expansion and emptying rhythm on the inhale and exhale. Therefore, if it feels like you are trying to force the breath upward on the inhale and downward on the exhale, then forget about the three parts and focus on depth and expansion on the inhale, and softening and release on the exhale.
When Do I Practise Three-Part Pranayama?
This is a great practice to bookend your asana practise, or as a preparation for meditation. It can be deeply relaxing and can be done lying down, so if you are preparing for a guided relaxation or Yoga Nidra it is great preparation.
Go gently with it before your asana practise as the body isn’t warmed up so it is easier to force the breath, and the torso may not feel so spacious.
At the close of practise it is a great way to transition into Savasana.
Off the yoga mat, this practice is safe for basically any time or any place –– particularly if you are in need of some grounding or rest. If it makes you sleepy please don’t do it whilst driving. It’s a great practice to do when in bed.
When Shouldn’t I Practice or Teach it?
There are very few occasions when this practice is inappropriate. But as it is a restful practice it doesn’t make sense to do it during very dynamic activities.
It is a great way to introduce pranayama into your own or student’s practices. However, as pranayama affects the nervous system, it needs to be felt out and approached slowly. If it makes you feel dizzy, light-headed or anxious then stop.
As it is gentle and soothing in nature, it may be safe and welcoming for students who have neurological conditions, however, it also might not be. Everybody is different. Listen to the feedback your body or your students are giving you.
How Do I Adapt Three-Part Pranayama To Make it Accessible? What Are Some Common Difficulties?
- Those who are new to yoga or pranayama may have a disrupted breathing pattern where they draw the belly in on the inhale and push it out on the exhale. Before introducing any pranayama practice, particularly to beginners, make sure they are familiar and comfortable with the breath expanding the torso on the inhale and emptying the torso on the exhale.
- If you, or any of your students, experience anxiety working with the breath can be challenging and triggering. Even just bringing awareness to the breath can be anxiety inducing. Always give yourself and your students the option of releasing, ignoring or adapting the practice. Just focusing on breathing into the mid-belly might be more comfortable, as bringing the breath very high into the chest or low into the pelvis can be triggering. Placing hands or a light object on the belly might also be comforting.
- Refrain from giving a prescribed count, everybody’s breath length and lung capacity is different. Although traditionally the breath is only through the nose, experiment with exhaling through the mouth – this may be more grounding for some people.
How Do I Teach Three-Part Pranayama To A Mixed Ability Class?
- The things to be most mindful of is that your students will have different lung capacities and different levels of comfort when it comes to working directly with the breath.
- Explain the practise before you teach it, and make sure you cover any potential issues beforehand. What is most key is that you establish the intention of the practice, and encourage your students to make the practice work in a way that aligns with that intention, even if it means disregarding or adapting certain instructions.
- Not everybody will be able to feel the breath in the back or sides of their ribs, comfortably be able to draw the breath up to the collar bones, or soften into the pelvic bowl. Acknowledge this. Emphasise that you are giving options depending on how comfortable you are working with the breath,
- Use a visualisation to guide the inhale and exhale. For example, as you inhale and fill from the belly to the chest imagine you are pouring water into a glass, filling it from the bottom to the top. As you exhale imagine you are pouring out the water, emptying it from the top to the bottom.
- Leave enough time for the practice, minimum of 10 minutes (but 15 will prevent any rush). This gives enough time to explain it, do the preparation and practise it. As working with the breath affects the nervous system it is important not to rush pranayama practices.
Unless you know all the students well, including their familiarity and comfort with pranayama, do not introduce retentions or bandhas. If you would like to have this as an option, assume your more experienced students will know how to work with them already and suggest they are welcome to add them (by not explaining them, students who are not familiar with the practices won’t be able to do them). Save teaching bandha and retentions for workshops, one-to-one classes, or classes devoted solely to pranayama.
4 thoughts on “How To: Three-Part Pranayama”
Pingback: Deepening and Developing Your Home Yoga Practice – Nourish Yoga Training
Pingback: How To Do: Nadi Shodhana (Alternate Nostril Breathing) – Nourish Yoga Training
Pingback: How To: Bhramari Pranayama – Nourish Yoga Training
Pingback: How To: Ujjayi Pranayama – Nourish Yoga Training